Natural Science Conference Room
Updated: 8/6/2025
- Locate the silver SP touch control panel mounted to the wall. If the panel has a black screen, press the screen to “wake” the device up.
- Press the power “ON” button to turn on the two displays.
- Select the Source to view on the displays.
- At the end of use, press the power “OFF”
Sources on the control panel:
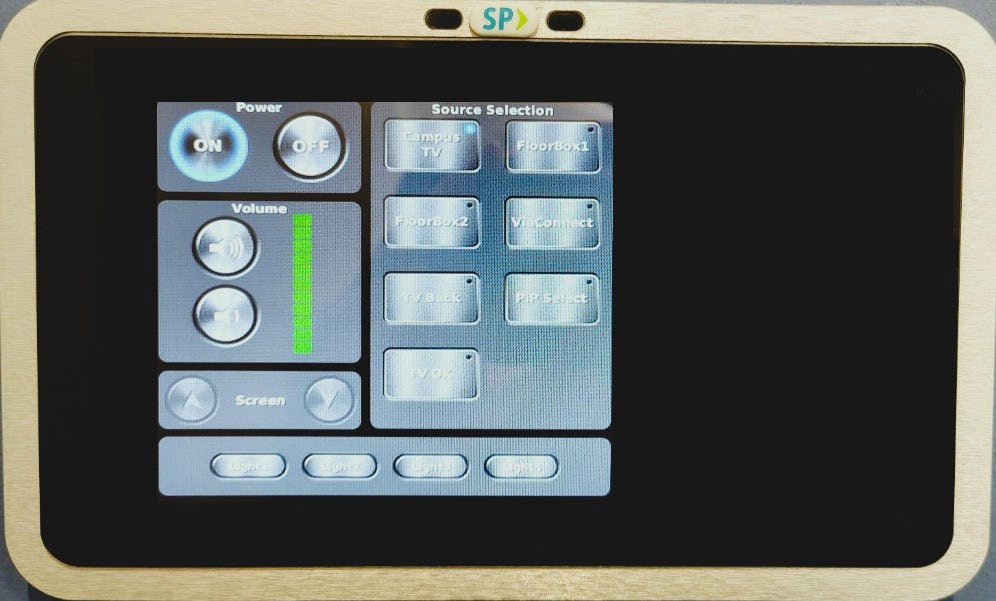
- Campus TV: This source activates the college’s live cable network. You can change the channel by using the THOR Broadcasting device located behind the display. Use the “plus” and “minus” buttons on the THOR device to navigate.
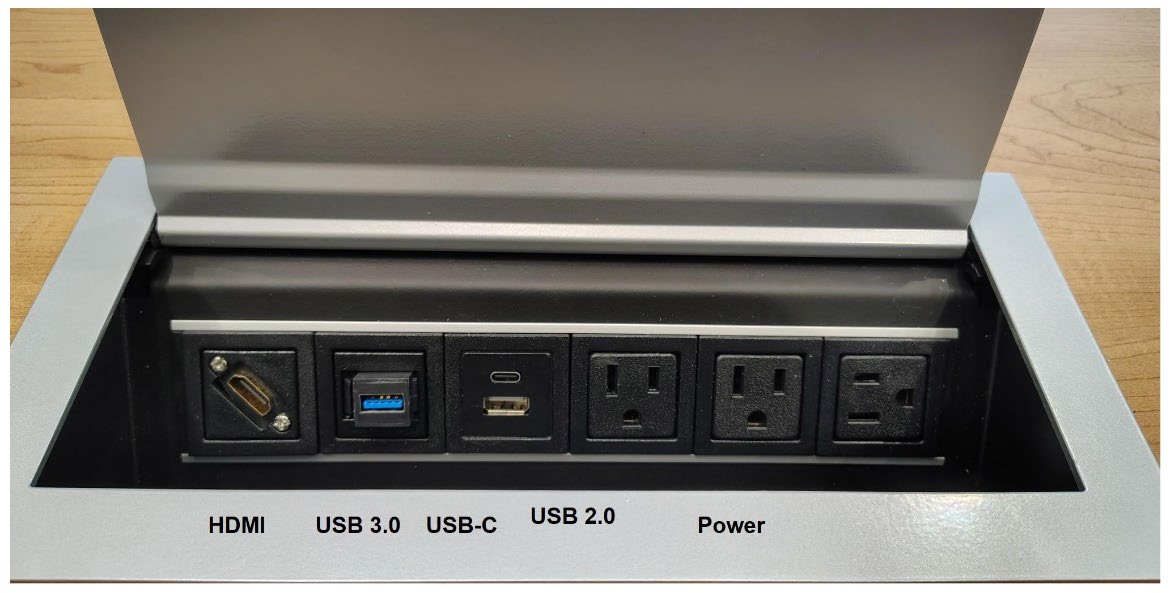
- Floor Box 1 & 2: To view a personal device, connect the device (with an HDMI cable) to the plate on top of the conference room table. Select “Floor Box 1” or “Floor Box 2” from the control panel.
- VIA Connect: For connecting a personal device wirelessly (see below for more information).
- TV Back/PIP Select/TV OK: These sources are used to clear any messages that may come up on the displays.
- Volume Control: Adjust the audio in the room.
- Lighting: The control panel has 4 lighting presets to choose between.
Conference Room Table Plate:
Kramer VIA Connect² Quick Start Guide
Step 1: Connect your personal device to the proper network
You will need to connect your personal wireless device to the correct WIFI network for wireless collaboration. Below is the network information:
WIFI Name (SSID): Gulfcoast
Password: NaturalScience1
*NOTE: Once you are finished using the Kramer VIA Connect, please disconnect the personal device from the ‘Gulfcoast’ WIFI. If desired, please reconnect your device to the ‘GC-Wireless’ WIFI using your individually assigned password. If you do not know your individual password, please contact the Technical Support desk at (850) 769-1551 ext. 3303.
Step 2: Turn on the display and check the input
Use the remote control to turn on the display. The display will default to HDMI 1 or 2. One of these inputs will have the Kramer VIA log in information. Keep the display on this input during use.
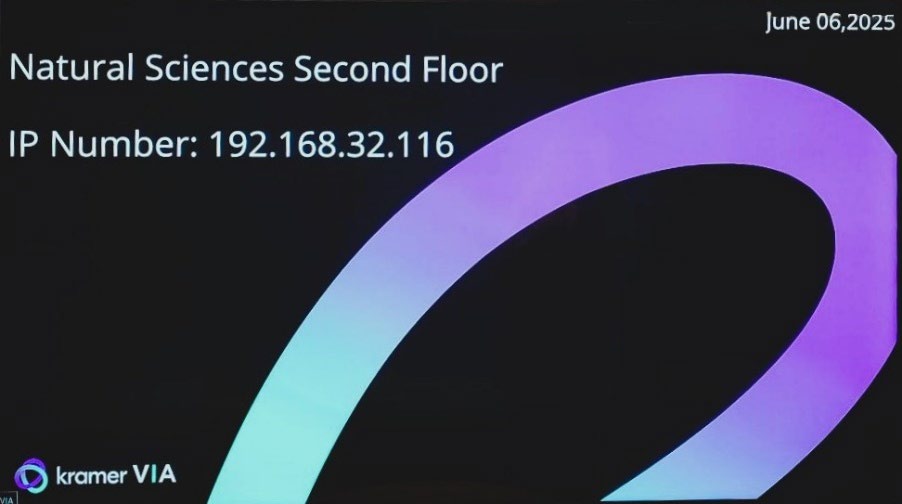
Step 3: Run or Download the Kramer VIA app
- Enter the IP number on screen into your computer’s The Welcome page of VIA Connect² will appear:
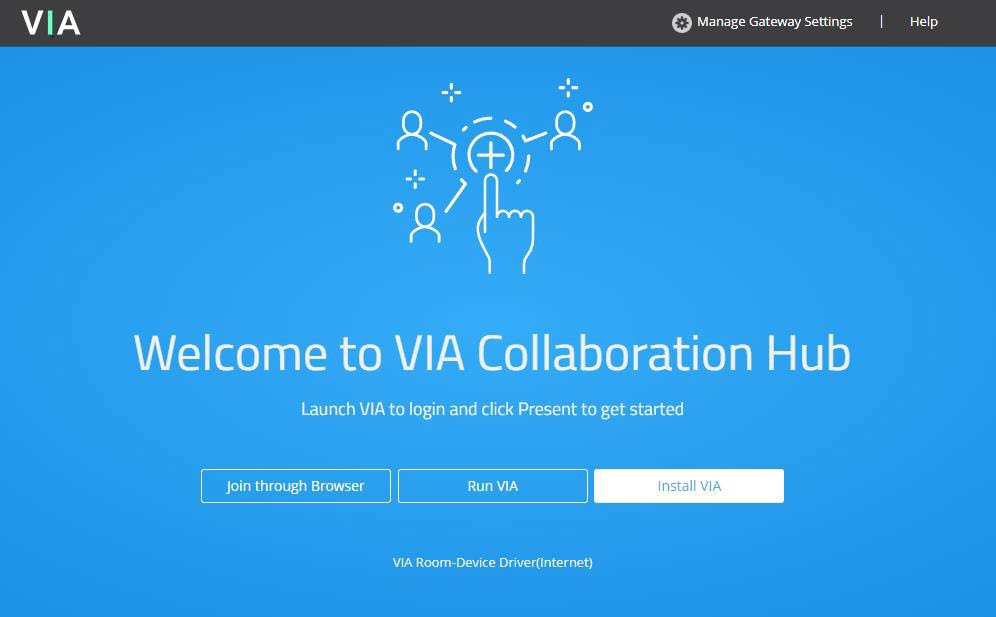
- Click Run VIA to execute the Kramer VIA app without downloading Ideal for guests who are using VIA temporarily. Click Install VIA to download the Kramer VIA app onto your computer. Or Click Join Through Browser to use an online version of Kramer VIA.
- For IOS and Android devices: download the free Kramer VIA app from the Apple App Store or Google
 Step 4: Joining the meeting with the Kramer VIA app
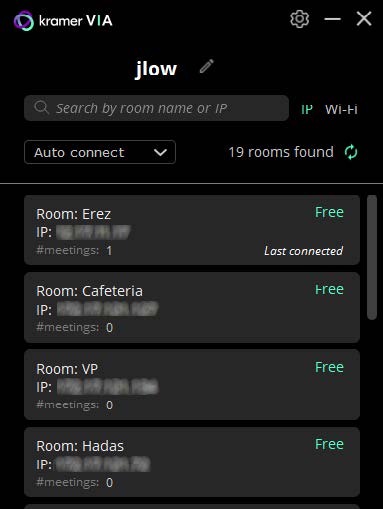
- If using the Kramer VIA app, select the room or IP to which you want to connect. If your site requires a Room Code, the Room Code window will
- In the Room Code field, enter the 4-digit code as it appears on the Main
- You are logged into the VIA
The VIA Dashboard appears on your device screen.
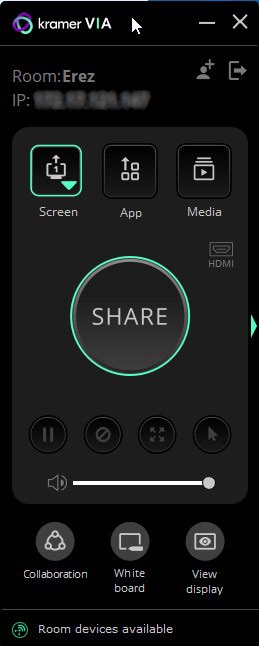
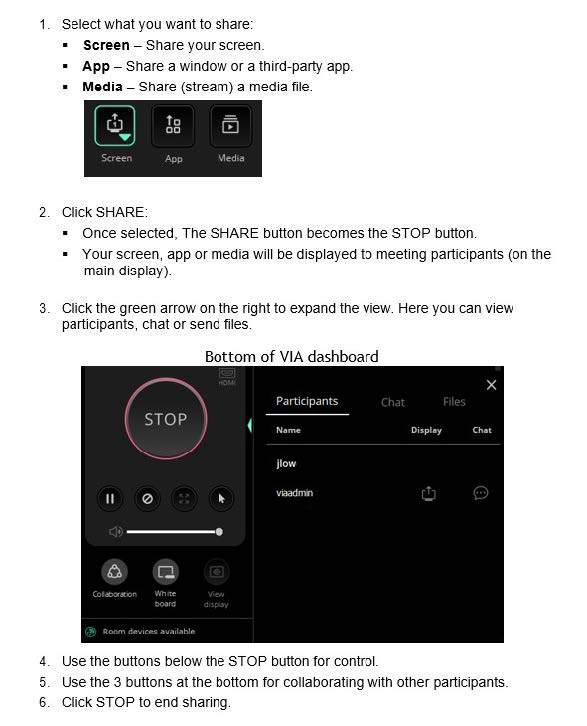
Step 5: Using the VIA dashboard menu
 |
 |
If you need any assistance, please contact the Technical Support desk.