Contact
technicalsupport@gulfcoast.edu
850.913.3303
PaperCut for Kyocera instructions
Updated: 2/26/2025
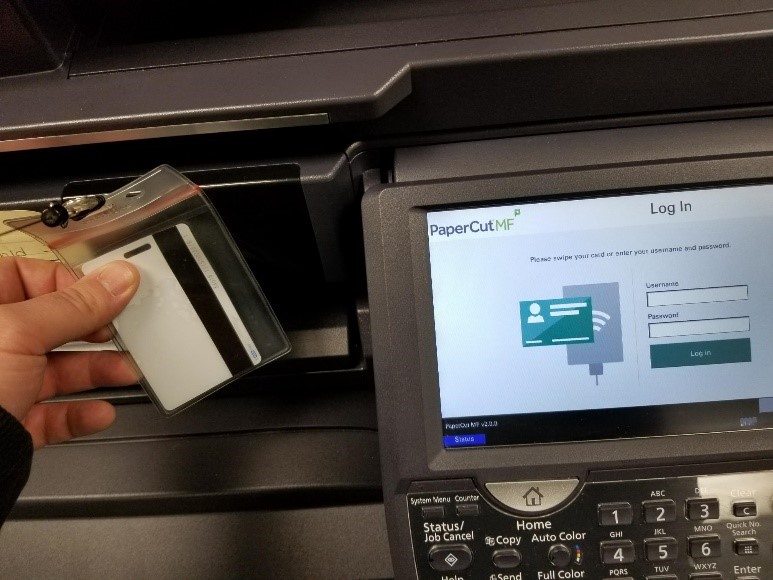
Signing In/Badge Authentication
- Sign in.
- You can enter your network credentials every time, or:
- Scan your ID / key card.

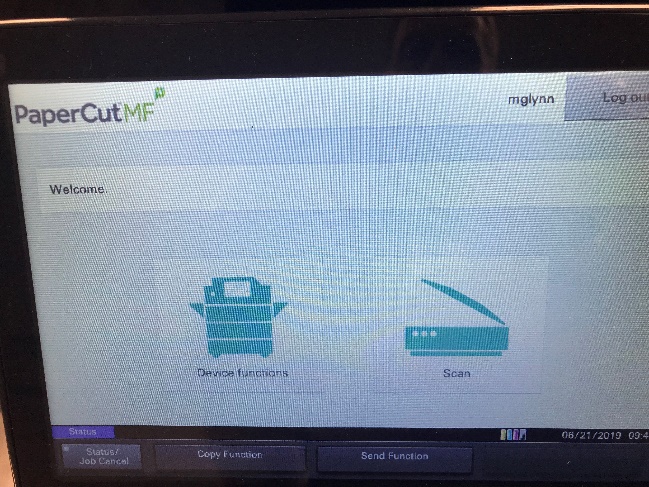
- After signing in, or scanning your badge, you will see this screen.
- Print Release- Ensures secure printing. Requires users to physically stand at the printer before the output appears in the tray, protecting confidential information.
- Device functions – takes you to a familiar interface for copying.
- Scan – Scan to Email using a simplified interface.

Device Functions (Copy or reach original Kyocera Menu)
- If you select Device functions from the menu, you will be presented with the Copy
dialog.
3: Pressing the Home button for the Copy dialog
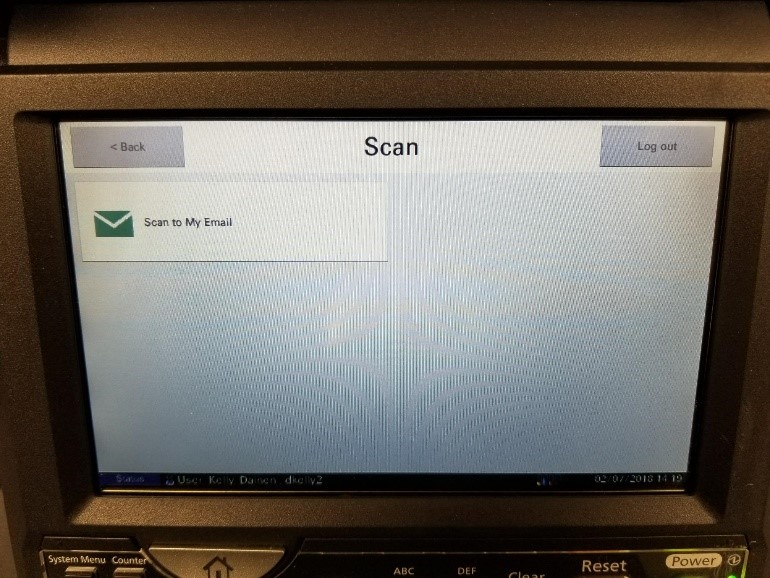
Scan to My Email - If you select Scan from the PaperCutMF menu, you will see a simplified Scan-to-Email
dialog.


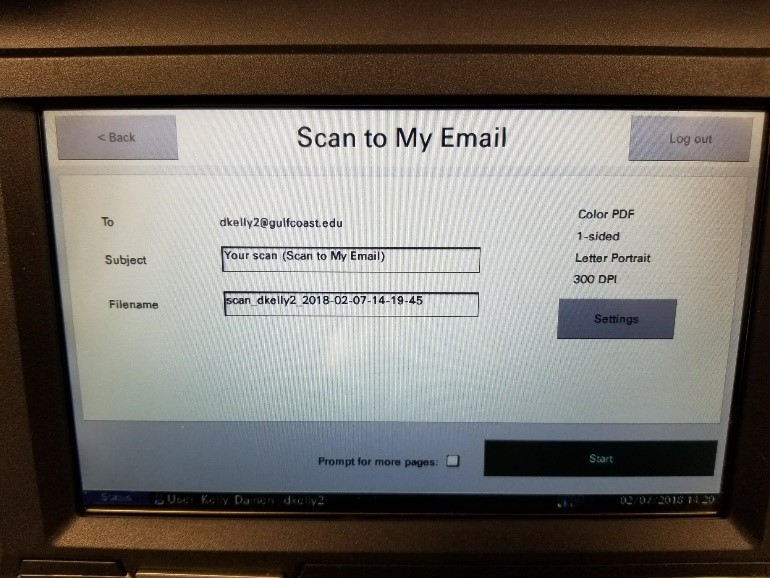
- Choose “Scan to My Email”, fill in the info / adjust settings on the next page, and
choose “Start”.
Signing Out
- When you are finished, be sure to use the “Log out” button on the top-right of the menus.